Wednesday, August 8, 2012

Art for the Bathroom.


About a month ago I decided I was tired of our plain white waffle pattern shower curtain. So on a girls night out for my birthday, my friends and myself decided to stop by TJ Max (or TJs as Maddie calls it! ha!) to shop for cute outfits. Well rather than finding a cute outfit, I found this!


Isn't this baby beautiful? At $15.99 I couldn't turn it down knowing my bathroom was in dire need of some color. One thing this beauty doesn't lack. 

It has really spruced up the bathroom this past month, but now I have to switch my gear to the other side of the room. The wall above the toilet is plain. Like blah plain. So I turned to Pinterest for a little inspiration. I started to think I should integrate the same colors from the shower curtain over but I wasn't sure how. Then it hit me, why am I over thinking it? I love the chevron aspect of my shower curtain, so why not just make some chevron art. 

I grabbed my Prismacolor markers, did some color matching between my markers and shower curtain, and quickly got down to business. The colors I chose were; Indigo Blue, Aquamarine, Light Aqua, Yellow Ochre, and French Grey 50%.


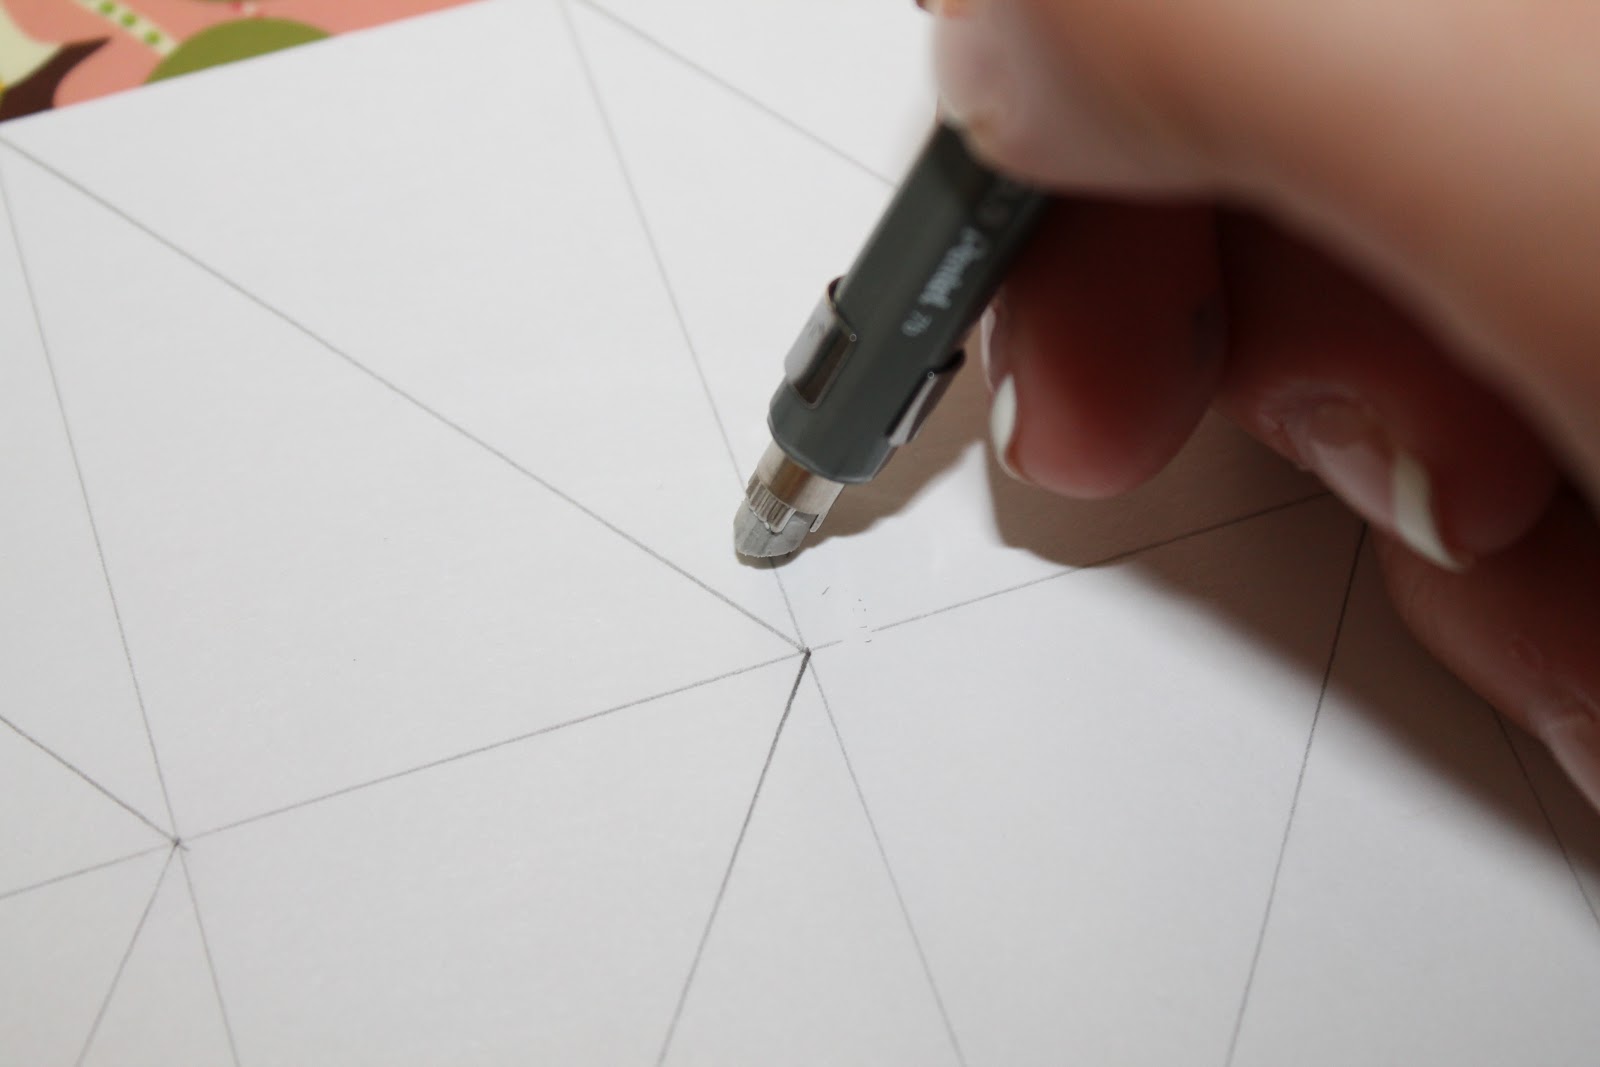
Rather than dashing out to a craft store and spending money, which since becoming a home owner I'm finding is a extremely precious thing, I opted to use some 8 1/2 x 11 card stock that I already had laying around the house. I trimmed the card stock down by about a half inch on the top edge and side edge. I then used my ruler and marked off every 1 1/2" on the long side of the card stock, and measured right in the middle of the short edge, and then "guesstimated" where the even marks on either side of that was. (Got to love guessimating!) I then made a grid on my card stock so I could create my chevron pattern.


You can see my concept of my grid in the picture above. I was in a work with what you've got situation, since I couldn't find a ruler, so I used a scrap piece of card stock to connect my points. 


I erased all the lines from the grid which left me with just my chevron pattern.


And then I repeated that two more times!

I went off my picture of the shower curtain, (I know I know, surprising that I didn't work on my art in the bathroom right?) so I could mimmic the color pattern onto my templets. I used the fine point of my Prisma's to trace an outline before filling in the chevron areas with the bold tip side. 


After many a few hours/Grey's Anatomy episodes and a lunch break for some Penn Station, I was finally finished! Which left me with this, and I love it. 


I've been brainstorming on how I want to hang them. As of right now I'm thinking white frames. I'll probably pick some up from Dollar Tree, hopefully tomorrow (but I'm not going to be to ambitious!) I'm planning on hanging them like I've got them laying above. 

I think we should get a close up of how pretty they are, shouldn't we?


I can't wait to get them hung, and also for my Prismacolor head ache to go away, man those bad boys are potent. After many hours spent using those in rendering class in school, I'm just thanking my lucky stars this was a quick project!

Has anyone else done any DIY art lately? Hopefully you already had stuff laying around the house like me and didn't have to spend any money!

Anyways, happy Wednesday guys!

Tuesday, April 10, 2012

Recent DIYs

I got a wild hair last night and decided to do a few DIY projects. Things that I had pinned on Pinterest but had yet to get around to. 

The first one that I decided to do was an idea that I found from here. The link goes to my pin, and will then take you to the tutorial that I used to get myself started. Its a pretty simple project, so I didn't necessarily need a step by step how-to, but it helped to know exactly what items I needed.  

I used:
-Half pint Mason Jars
-Pretty patterned card stock
-Baking soda
-Lavender oil scents
-Paring knife

Its so simple I feel like I don't need to describe how to do this, but for the sake of the post, I will. 
First I took the metal seal lid off of the mason jar to use as my guide to cut out my card stock.
Next I cut out my card stock and placed it in the lid and screwed it onto the mason jar. Then I used my paring knife to poke holes in the card stock. In the tutorial, it suggested that you use a thick needle to poke the holes, but I didn't have one, and the knife worked just as well, it's just not a pretty. 
Then I removed the lid and filled the Mason Jar with baking soda, probably a little over a half a cup.
Then I put about 12 drops of my lavender oil scent into the baking soda, before I screwed the lid back onto the jar. 
Ta-da! Now you have a cheap air freshener!
I'm using mine for my closet.

My second project of the night was a mail holder that we can hang on the side of the fridge. I'm so sick of looking at the mail cluttered all over the counter and kitchen table. 
I got my inspiration from here.
I used a recently empty Cheerios box for this project. 
I wish I could say the hardest part of this project was wrapping the box with the wrapping paper, but it wasn't... It was actually finding the wrapping paper that I wanted to use for this project. 
Thank you Wal-Greens, you never let me down!
Basically all I did was wrap it like a really awkward present.
I forgot to buy magnets, so as of right now it isn't actually hanging on the fridge, but It still looks darn good! Not to mention that the counter looks EVEN BETTER without all the clutter!

Since my mail holder project required wrapping paper, I made my first wrapping paper purchase since we've moved into the house. & in the game of keeping the unorganized organized, I put this inspiration to great use!


I made my paint swatch dry erase calender quite some time ago, but I never put it to good use, as in I never actually kept it updated! I think when I updated it for this month, I erased July 2011 off of it it. Go team slacker! My inspiration is from here. I do want to update it and add 4 extra orange swatches to the bottom row, to make it a more functional calendar.


Thats about it for now! I'm hoping to be back with more in a day or two!

Life Updates.

I have been slacking at posting for one reason and one reason alone..

WE BOUGHT A HOUSE!

Alas! The day came and my dreams have come true!
& we could not be more happy!
We put in our contract after coming to the open house on Super Bowl Sunday! At least we will always be able to remember the day that we took the leap!


Here it is, our precious little house. Home sweet home in Pewee Valley!

Here are my before pictures, I took them the day that we closed.

The living room.

Standing right inside the front door, looking to the right.

 Still standing at the front door, majority of the living room.

Still at the front door, looking into the kitchen.

Standing in the opposite corner of the front door. Hallway opening, and laundry room.

Looking at the front window, and door. 

Side view of the fire place. 

The kitchen.

 Standing in the opening from the living room.

Standing in back doorway, which is seen open in above picture.  

In the corner next to the window. Looking towards the driveway door.

Still in corner, looking back towards living room. 

Hallway, Bedrooms, and Bathrooms.

The hallway. We had to lake the light out because the previous owner had a 100 watt light bulb in the fixture, which had basically burnt a ring into the ceiling plate. That problem is all fixed now!

Front bedroom.

Back bedroom. 

Master (our!) bedroom. Looking in from the door. The door to the right is my closet.

Our bedroom, looking towards his closet, and the window. 

 In the bathroom door, looking towards the bedroom door.

Our bathroom.

Our bathroom vanity.
In the bathroom looking into our bedroom. 

My closet.

The house has two bathrooms, but I was slacking and forgot to get one on my camera, and I'm having a bit of trouble locating in all of my pictures that I've uploaded from my phone.

We are so proud of it, and have been in it for just over two weeks now. It has officially been ours for about a month. It is a constant work in progress, but thanks to Adam's parents we have everything repaired, and painted! 

An after post will be coming sooner than later, I'm hoping to wait until we have our couch. Keep your fingers crossed for us on that!

Monday, December 19, 2011

Oh Christmas Tree!

Christmas really is the most wonderful time of the year. One of my favorite things about Christmas is decorating the tree! I absolutely love collecting & making ornaments! My poor little tree seems like it has nothing on it, but I wanted to share my favorite ornaments!


This ornament was given to Adam & myself by his parents christmas of 2009. This was our second christmas together. It was our first ornament that someone had given us since we became a couple, and I had just joined the fire department in April 2009. This ornament means so much to me!


My mother bought me this ornament Christmas of 2007, after a good friend of mine passed away earlier that year. Having this on my tree always reminds me that Megan is not only with me during the holiday season, but also every day of the year. 


This ornament has no sentimental value like the first two. I just love how unique it is.


Though I cannot remember the year I received this ornament, it will always remind me of my true passion from high school, which was playing the clarinet. 


Another unique, but not sentimental ornament. I believe Adam's grandmother gave this ornament to me.


This was an ornament that I made this year. This is clearly one of the easiest ways to make ornaments. Each one is different and unique. 


Football was my other passion in high school. These ornaments were given to us on year. This one looks kind of rough because it was in a jacket pocket and it got washed! If you ask me, I think it gives the ornament a rustic character.

For now these ornaments are the only ones worth sharing. Plus I haven't been collecting my own ornaments for long. Some day my collection will be exactly what I want it to be. 

30 Day Photo Challenge - Day One

I have always wanted to do a 30 Day Photo Challenge, and I figured that since I just bought my Canon Rebel, its time to do one. 


Here is the challenge I chose


Day 1 - Self Portrait


♥ kp


Monday, December 12, 2011

So apparently I'm not good at this...

Its almost been a year since I've posted on here. I so suck.

I plan to revamp the blog over the next few days, and I'm going to challenge myself to post everyday. I've got a few idea's on how to do this. Thank goodness I'm not under the same pressure most college students are under this week with finals. YAY for being a design student!

I'll be back after fire training, hopefully with a few blog updates.. and definitely a post!

♥ kp.

Sunday, February 13, 2011

Chairs.

I've been thinking about getting a chair to put in the corner of my room, something to read in.. at least thats my hopes.
I saw this nailhead chair on Country Door and really liked it, be decided not to just pick the first chair I see.


I also think I'm probably going to want a chair I can get completely lost in. So the McIntyre Chair and a half from Crate & Barrel would probably do the trick.


Thus far, these two are the only two that have caught my eye. But there is always thrifting, because these two where also rather pricey. So we will see.

Anyone else know of any really worth while chairs for me to check out?